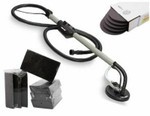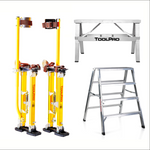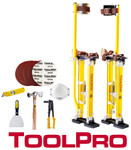
ToolPro are the drywall tools that professionals ask for because they are durable, functional, and fairly priced. And they enable me to do my job, make a good living, and support my family. The essential tools for drywall work are grouped as hanging tools, finishing tools, sanding tools, suspended ceiling tools, and general jobsite tools and accessories. In addition, stilts are a top-rated accessory because they make it easier to work at the top of the wall and on the ceiling without using cumbersome scaffolding.

Drywall tools are essential for professionals in the interior construction and renovation industry. Whether you're hanging, finishing, or repairing drywall, having the right tools can make all the difference in achieving a smooth and professional-looking finish. These specialized tools are designed to streamline the process, enhance efficiency, and ensure precision in every step of working with drywall.
From cutting and shaping to taping and sanding, there is a wide array of drywall tools available to suit different tasks and skill levels. These tools not only facilitate the installation and finishing of drywall but also help in achieving seamless joints, smooth surfaces, and sturdy constructions.
ToolPro is a name you can trust in selecting your tools and supplies for drywall work and all other types of interior construction.
Installing roofing is a complex task that requires skill and experience, and also a set of specialized tools. Whether you're a professional roofer or a DIY enthusiast looking to undertake a roofing project, knowing the essential tools of the trade is crucial. Here's a list to guide you through the must-have tools for residential roofing installation:
Each of these tools plays a crucial role in the various stages of roofing installation, from preparation to the finishing touches. While some tools, like the nail gun and utility knife, are used throughout the project, others may be specific to certain tasks or materials, such as snips for metal roofing or a seam roller for rolled roofing. Regardless of the project's scope, equipping yourself with these essential tools will help ensure a successful and safe roofing installation.
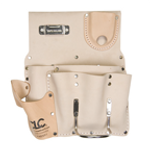
Interior construction professionals rely on a variety of storage solutions to keep their essential tools accessible, organized, and secure while on the job. Leather tool bags, nail bags, tool belts, and similar items are indispensable for carrying tools and supplies, designed to meet the demands of various tasks from drywall installation to electrical work.
Leather Tool Bags
Nail Bags
Tool Belts
Additional Items
Whether it's the rugged durability of a leather tool bag, the practicality of a nail bag, the customizable convenience of a tool belt, or the specialized design of electrician's tool bags, these carrying solutions are key to maintaining efficiency, organization, and professionalism in interior construction projects. Equipping oneself with the right type of storage not only facilitates ease of work but also protects valuable tools from damage and loss, ensuring that every professional is prepared for the task at hand.

Tools for Textured Finishes
Supplies for Textured Finishes
Whether you're looking to add a subtle texture to your living room walls or aiming for a dramatic effect on a ceiling, the combination of the right tools and supplies with proper technique is key to achieving beautiful, lasting textured finishes. From the preparation of the surface with primers to the final touches with paints and glazes, each step in the process contributes to the overall quality and durability of the textured finish.

Explore our extensive selection of specialty fasteners for interior construction, designed to meet every project's unique requirements. From drop ceiling clips and fasteners that ensure a secure and level installation, to powder-actuated fasteners for attaching materials to concrete and steel. Discover our high-quality pull rivets for reliable joint connections in metal framing, and specialized fasteners for Exterior Insulation and Finish Systems (EIFS) that provide superior holding power while preventing thermal bridging.
Dive into our collection of concrete screw anchors, engineered for anchoring in concrete, brick, and block. Don't miss our resilient mounting solutions for reducing vibration and noise transmission in walls and ceilings.
On interior construction projects, our specialty fasteners offer the reliability and performance you need. With options for drop ceiling installations, metal framing, concrete anchoring, EIFS applications, and more, find the fastening solutions to complete your projects with confidence and efficiency. Shop now for specialty fasteners that bring strength, durability, and innovation to interior construction.
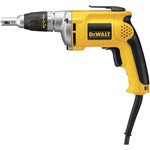
Power Tools For Constructing Interior Walls and Ceilings
Power tools and their accessories are the backbone of efficient interior construction work, enabling professionals and DIY enthusiasts to achieve professional-grade results in constructing stud walls, ceilings, and installing drywall and drop ceilings. By choosing the right tools and utilizing them properly, builders can ensure structural integrity, aesthetic appeal, and long-lasting performance in their projects.
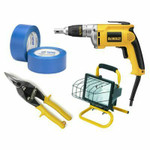
A wide variety of tools and materials are needed on any jobsite. Some items might be as follows:
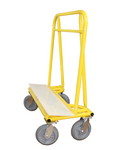
Step-Up Benches, Ladders, Scaffolds - Necessary for reaching high areas. Available in various heights.
A variety of tapes:
Tool Pouches and Nail Bags - Keep tools organized and accessible right on your belt.
Miscellaneous Hand Tools:
Electrical Lighting - Includes work lights, portable lamps, and flashlights.
Levels - Ensure installations are even. Includes spirit, laser, and digital levels.
Lubricants - Options like WD-40, silicone sprays, and graphite powders help maintain tool efficiency and prevent rust.